HOME WINEMAKER DEPOT welcomes you! This guide offers a fun, step-by-step journey into crafting your own wine, raising a glass to your future success.
The Appeal of Crafting Your Own Wine
The allure of home winemaking stems from a deeply satisfying connection to a time-honored tradition, transforming simple grapes into a complex and enjoyable beverage. It’s a creative outlet, allowing for personalized flavors and styles unavailable in commercially produced wines. Beyond the enjoyment of the final product, the process itself is incredibly rewarding.
Home winemaking offers a unique opportunity to understand the nuances of viticulture and enology, appreciating the impact of grape variety, climate, and technique. It’s a journey of learning and experimentation, where each batch presents a new challenge and a chance to refine your skills. Furthermore, crafting your own wine can be surprisingly economical, especially when sourcing grapes locally or during harvest season.
HOME WINEMAKER DEPOT believes that the satisfaction of sharing a bottle of wine you’ve personally created with friends and family is unparalleled, fostering connection and celebration. It’s a truly fulfilling hobby!
Essential Equipment for Beginners
Starting your winemaking journey doesn’t require a vast investment, but certain equipment is crucial for success. A primary fermenter – typically a food-grade plastic bucket – is essential for the initial stage of fermentation. You’ll also need a secondary fermenter, often a glass carboy, for aging and clarification.
Accurate measurement is key, so a hydrometer is vital for tracking sugar levels and fermentation progress. An airlock is necessary to allow CO2 to escape while preventing oxygen from entering. Siphoning equipment, like a racking cane and tubing, facilitates transferring wine without disturbing sediment.
HOME WINEMAKER DEPOT recommends investing in a good quality wine thief for sampling, bottles and corks for final packaging, and cleaning/sanitizing solutions to maintain a sterile environment. While optional, a crusher/destemmer can significantly simplify grape preparation. Remember, sanitation is paramount!
Understanding Basic Winemaking Terminology
Embarking on winemaking requires familiarizing yourself with specific terms. “Brix” measures the sugar content in grapes, crucial for predicting alcohol levels. “pH” indicates acidity, impacting wine’s taste and stability. “TA,” or Titratable Acidity, provides a comprehensive acidity measurement.
“Must” refers to the grape juice before fermentation. “Fermentation” is the process where yeast converts sugar into alcohol and carbon dioxide. “Racking” involves carefully transferring wine to a clean vessel, leaving sediment behind. “Fining” uses agents to clarify the wine by removing suspended particles.
HOME WINEMAKER DEPOT highlights terms like “MLF” (Malolactic Fermentation), a secondary fermentation converting malic acid to lactic acid, softening the wine. Understanding “oxidation” and “reduction” – relating to oxygen exposure – is vital for wine health. These terms, and many others, will become second nature as you progress!
Grape Selection and Preparation
Selecting quality grapes is paramount; consider varieties suited to your palate and climate, ensuring proper assessment of Brix, pH, and Titratable Acidity levels.
Choosing the Right Grape Varieties
Selecting grape varieties is a foundational step, deeply influencing the final wine’s character. Consider your regional climate; certain grapes thrive where others struggle. For beginners, disease-resistant varieties like Seyval Blanc or Concord are excellent choices, offering reliable results.
Red wine enthusiasts might explore Cabernet Sauvignon, Merlot, or Pinot Noir, while white wine lovers could consider Chardonnay, Sauvignon Blanc, or Riesling. Remember that some grapes, like Zinfandel, are incredibly versatile.
Rosé wines often utilize grapes like Grenache or Cinsault. Don’t overlook hybrid grapes, bred for specific climates and disease resistance. Research each variety’s characteristics – acidity, tannin levels, flavor profiles – to align with your desired wine style. Ultimately, choosing the right grape is a blend of science and personal preference, setting the stage for a rewarding winemaking experience.
Assessing Grape Quality (Brix, pH, TA)
Accurate assessment of grape quality is crucial before fermentation. Three key measurements are Brix (sugar content), pH (acidity), and TA (titratable acidity). Brix, measured with a refractometer, indicates potential alcohol levels; ideal ranges vary by wine style, typically 21-25° Brix.
pH measures acidity, impacting wine stability and flavor. A pH between 3.0 and 3;6 is generally desired. TA, determined through titration, provides a complete acidity picture, influencing taste and aging potential.
These measurements ensure balanced fermentation and a stable final product. Low Brix may require sugar adjustments, while improper pH or TA can lead to flawed wines. Regularly monitoring these parameters throughout the ripening process allows for informed decisions, maximizing grape potential and ensuring a high-quality wine.
Grape Crushing and Destemming Techniques
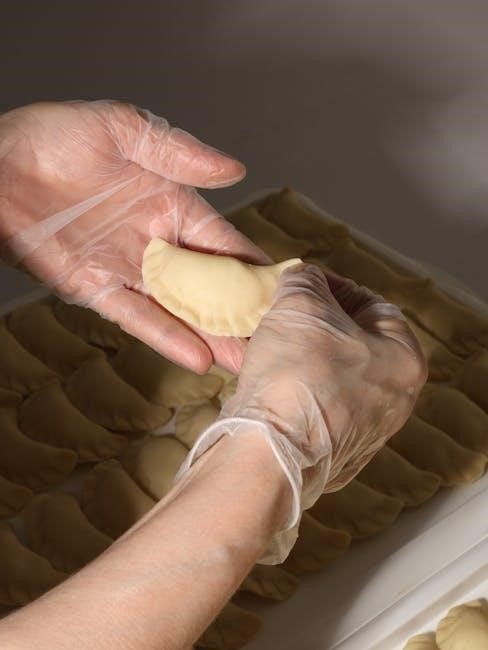
Preparing grapes for fermentation involves crushing and destemming. Destemming separates the berries from the stems, preventing harsh tannins in the final wine. Crushing gently breaks the skins, releasing juice and pulp for fermentation. Historically done by foot, modern winemakers utilize mechanical crushers/destemmers.
These machines adjust pressure to avoid excessive seed breakage, which can also contribute unwanted bitterness. Some winemakers opt for whole-cluster fermentation, leaving stems intact for added structure and complexity, particularly in red wines.
The goal is to maximize juice extraction while minimizing undesirable compounds. Proper technique ensures efficient fermentation and optimal flavor development. Gentle handling preserves berry integrity, leading to a more refined and balanced wine. Careful consideration of these techniques is vital for quality winemaking.
Primary Fermentation
Initiating fermentation transforms grape juice into wine using yeast. This crucial stage dictates the wine’s character, demanding careful monitoring and temperature control for success.
Yeast Selection and Preparation
Selecting the right yeast strain is paramount for successful fermentation, influencing the wine’s aroma, flavor, and alcohol content. Numerous strains cater to different grape varieties and desired wine styles – red wine yeasts, white wine yeasts, and specialized options for fruit wines.
Dry active yeast is commonly used by home winemakers, requiring rehydration before pitching. This involves gently sprinkling the yeast into lukewarm, sanitized water (typically around 104-107°F or 40-42°C) with a nutrient supplement. Allow it to sit for 15-20 minutes, observing for signs of activity – a foamy layer indicates the yeast is viable.
Proper rehydration ensures a healthy yeast population, crucial for a complete and clean fermentation. Avoid using water that is too hot or too cold, as this can kill the yeast cells. Once rehydrated, the yeast is ready to be pitched into the must (grape juice) to begin the fermentation process. Always follow the specific instructions provided with your chosen yeast strain for optimal results.
Setting Up the Primary Fermenter
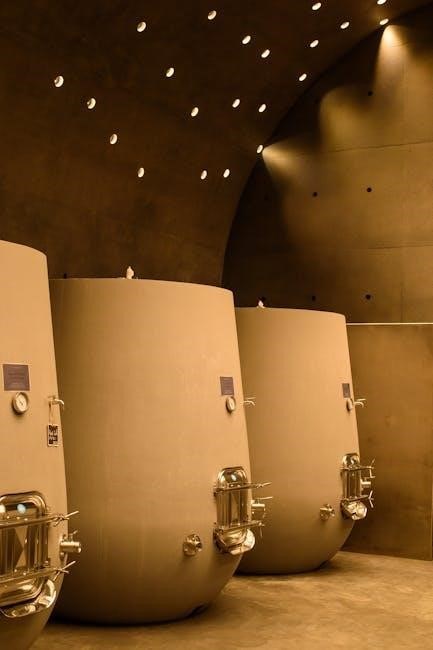
Choosing the right fermenter is crucial; food-grade plastic buckets or stainless steel containers are popular choices for primary fermentation. Ensure the fermenter is thoroughly cleaned and sanitized with a wine-specific sanitizer to eliminate any unwanted bacteria or wild yeasts.
Transfer the must (crushed grapes and juice) into the sanitized fermenter, leaving ample headspace – approximately 20-30% of the container’s volume – to accommodate the foaming action during fermentation. This prevents overflow and potential messes.

Add the rehydrated yeast to the must and gently stir to distribute it evenly. Consider adding yeast nutrient at this stage to provide essential nitrogen for the yeast, promoting a healthy fermentation. Seal the fermenter with an airlock, filled with sanitized water or a sanitizing solution, to allow CO2 to escape while preventing air from entering, protecting the wine from oxidation and spoilage.
Monitoring Fermentation Progress (Specific Gravity)
Regularly tracking specific gravity (SG) is vital to understand fermentation’s progress. Use a hydrometer – a calibrated instrument that measures the density of the liquid – to obtain accurate readings. Take initial SG reading before adding yeast, then daily measurements during active fermentation.
As yeast consumes sugar, it converts it into alcohol and carbon dioxide, decreasing the must’s density and lowering the SG. A consistent decline in SG indicates active fermentation. Record each reading meticulously to chart the process.
Fermentation is complete when the SG stabilizes for three consecutive days, reaching a final gravity typically between 0.990 and 1.000, depending on the desired alcohol level. This signifies that most of the available sugar has been converted. Accurate monitoring ensures a successful and predictable fermentation outcome.
Punching Down the Cap (for Red Wines)
During red wine fermentation, grape skins and solids rise to the surface, forming a “cap.” This cap contains valuable flavor compounds, color, and tannins crucial for the wine’s quality. Punching down the cap involves gently pushing these solids back into the fermenting juice.
This process, typically done 2-3 times daily during peak fermentation, ensures consistent extraction of these desirable components. Use a sanitized tool – a plunger, paddle, or even your (clean!) fist – to break up and submerge the cap.
Proper cap management prevents the cap from drying out and potentially harboring unwanted bacteria. It also promotes even temperature distribution and yeast activity. Consistent punching down contributes significantly to the development of a well-structured, flavorful, and richly colored red wine.
Secondary Fermentation & Clarification
Following primary fermentation, wine undergoes secondary processes like racking and optional malolactic fermentation, ultimately leading to clarity and stability.
Racking the Wine
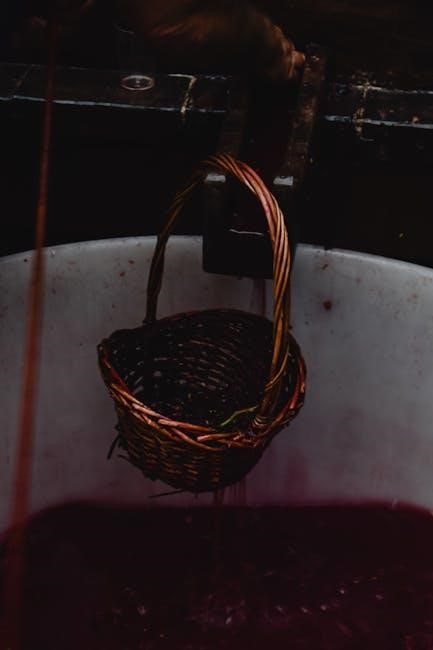
Racking is a crucial step in winemaking, involving carefully siphoning the wine off the sediment – known as the lees – that accumulates during fermentation and aging. This process clarifies the wine and helps prevent off-flavors. It’s typically performed multiple times throughout the winemaking process, each time leaving behind the settled sediment.
Begin by sanitizing all equipment: the racking cane, tubing, and receiving vessel. Gently insert the racking cane into the fermenter, avoiding disturbing the sediment layer. Slowly siphon the clear wine into the clean vessel, leaving the lees behind. Avoid splashing, as this can introduce oxygen.
The first racking usually occurs after primary fermentation is complete, while subsequent rackings are spaced out based on sediment buildup. Top up the receiving vessel to minimize headspace, reducing oxidation. Proper racking significantly contributes to a cleaner, more refined final product.
Malolactic Fermentation (MLF) – Optional
Malolactic Fermentation (MLF) is a secondary fermentation performed by lactic acid bacteria, converting harsh malic acid into softer lactic acid. This process isn’t essential, but it significantly impacts the wine’s flavor and texture, particularly in red wines, contributing to a smoother, creamier mouthfeel. It can also reduce acidity.
MLF is often desirable for red wines like Cabernet Sauvignon and Merlot, but less so for crisp white wines where higher acidity is preferred. Winemakers can inoculate with specific ML bacteria strains or allow it to occur naturally. Monitoring MLF involves testing for a decrease in malic acid and an increase in lactic acid.
Successful MLF requires appropriate temperature and nutrient levels. It’s crucial to ensure the wine is protected from spoilage bacteria during this process. While optional, MLF can elevate a wine’s complexity and overall quality.
Clarification Methods: Fining Agents
Clarification is vital for achieving a visually appealing and stable wine. Fining agents are substances added to wine to remove suspended particles causing haze or cloudiness. These agents work by binding to these particles, causing them to settle out of suspension.
Common fining agents include bentonite (for protein haze), gelatin (for tannins and color stabilization), isinglass (derived from fish bladders, effective for clarifying white wines), and egg whites (traditionally used for red wines). Each agent has specific properties and is best suited for different wine types and issues.
Fining trials are crucial to determine the optimal dosage, preventing over-fining which can strip desirable aromas and flavors. After fining, racking is necessary to separate the clear wine from the sediment. Proper fining significantly improves wine clarity and stability.
Stabilization Techniques: Cold Stabilization
Cold stabilization is a crucial step in winemaking, preventing the formation of unsightly tartrate crystals – often mistaken for glass shards – after bottling. These crystals are harmless but aesthetically undesirable. The process involves chilling the wine to near-freezing temperatures (around 25-30°F or -4 to -1°C) for a period of several days to weeks.
This chilling encourages the precipitation of potassium bitartrate crystals, which then settle out of the wine. Following cold stabilization, the wine is carefully racked off the sediment. While effective, cold stabilization can slightly reduce wine aroma, so it’s often balanced against the risk of post-bottling crystal formation.
It’s particularly important for white wines, which are more prone to tartrate instability. Careful monitoring of temperature and racking are essential for successful cold stabilization.
Aging and Maturation
Wine aging transforms flavors, developing complexity over time. Vessels like oak or stainless steel influence the process, impacting oxidation and reduction potential.
Choosing Aging Vessels (Oak vs. Stainless Steel)
Selecting the right aging vessel profoundly impacts your wine’s final character. Oak barrels, traditionally used for centuries, impart distinct flavors – vanilla, spice, and toast – derived from the wood’s compounds. These flavors integrate with the wine during the aging process, adding layers of complexity. Oak also allows for micro-oxygenation, a slow introduction of oxygen that softens tannins and enhances stability;
However, oak can be expensive and requires careful maintenance. Different oak origins (French, American, Hungarian) contribute unique flavor profiles. Stainless steel, conversely, is inert and doesn’t impart flavors. It preserves the wine’s original fruit characteristics and is ideal for wines where freshness and vibrancy are desired.
Stainless steel offers excellent temperature control and is easier to sanitize. The choice between oak and stainless steel depends on the wine style you’re aiming for and your budget. Some winemakers even employ a combination, utilizing oak for initial aging and stainless steel for stabilization.
Monitoring Wine During Aging
Consistent monitoring is crucial throughout the aging process to ensure optimal development and identify potential issues. Regularly check the wine’s clarity; haziness can indicate instability or microbial activity. Tasting the wine periodically – every few months – allows you to track flavor evolution and assess its progress. Note any changes in aroma, color, and taste, documenting your observations meticulously.
Pay close attention to signs of oxidation, such as browning or a sherry-like aroma, and reduction, characterized by sulfurous smells. Maintaining a stable temperature is vital, ideally between 55-65°F (13-18°C).
Top up vessels regularly to minimize headspace and prevent oxidation. Periodic racking (transferring the wine to a clean vessel) helps remove sediment and clarify the wine. Careful observation and proactive adjustments are key to crafting a well-aged, balanced wine.
Understanding Oxidation and Reduction
Oxidation and reduction are fundamental chemical reactions impacting wine aging. Oxidation, exposure to oxygen, can be beneficial in moderation, contributing to complexity and softening tannins. However, excessive oxidation leads to browning, loss of fruit flavors, and the development of undesirable aromas like vinegar or sherry.
Conversely, reduction occurs in the absence of oxygen, potentially resulting in unpleasant sulfurous odors – like rotten eggs or garlic. These reductive aromas can sometimes dissipate with aeration, but severe cases require corrective measures.
Managing these processes is vital. Minimizing headspace in aging vessels, using appropriate closures, and maintaining stable temperatures help control oxidation. Slight aeration during racking can address reduction. Recognizing the signs of each – color changes, aroma profiles – allows winemakers to proactively adjust techniques and preserve wine quality.
Bottling and Storage
Preparing bottles and corks is crucial for preserving your wine. Proper bottling procedures, followed by ideal storage conditions, ensure longevity and optimal flavor development.
Preparing Bottles and Corks
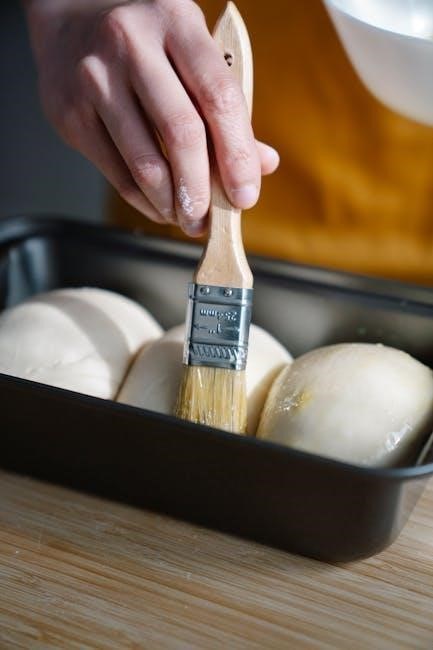
Before bottling your homemade wine, meticulous preparation of both bottles and corks is absolutely essential. Begin by thoroughly cleaning the bottles, utilizing a bottle washer or sanitizer specifically designed for winemaking. This removes any residual debris and prevents unwanted microbial growth that could spoil your hard work.
Sanitization is the next critical step; use a food-grade sanitizing solution, ensuring complete coverage and adherence to the manufacturer’s instructions. Allow the bottles to air dry completely – avoid using towels, as they can reintroduce contaminants.
Regarding corks, select high-quality corks appropriate for the intended aging period. Submerge the corks in a sanitizing solution for approximately ten minutes, then rinse with clean, potable water. A cork borer might be needed if using natural corks to ensure a proper fit. Finally, consider a light sulfur dioxide treatment before corking to further inhibit oxidation and microbial activity, safeguarding your wine’s quality.
Bottling Procedures
Initiating the bottling process requires a calm and sanitized environment. Begin by siphoning the wine from your aging vessel into a bottling bucket, avoiding splashing to minimize oxidation. Attach a bottling wand to the bucket’s spigot, ensuring a secure and airtight connection.
Position your prepared bottles one by one under the bottling wand’s spout. Fill each bottle, leaving appropriate headspace – typically about 1.5 to 2 inches from the bottom of the cork. Once filled, immediately insert a sanitized cork using a corker, applying firm and even pressure to create a tight seal.
After corking, wipe down any spilled wine from the bottle necks. Consider applying a capsule or foil over the cork for added protection and a professional finish. Finally, label your bottles with the wine type, vintage, and any other relevant information, completing the rewarding culmination of your winemaking efforts.
Proper Wine Storage Conditions
Maintaining optimal storage is crucial for preserving your homemade wine’s quality and allowing it to mature gracefully. The ideal temperature range for long-term storage is consistently between 55°F and 65°F (13°C to 18°C). Fluctuations can negatively impact the wine’s flavor profile and accelerate aging.
Darkness is essential; exposure to direct sunlight or bright artificial light can cause premature oxidation and alter the wine’s character; Store bottles horizontally, keeping the cork moist to prevent it from drying out and allowing air to enter. A dedicated wine cellar or a cool, dark closet are excellent options.
Minimize vibrations, as they can disrupt the sediment and affect the wine’s clarity. Avoid storing wine near appliances that generate significant vibrations. Consistent humidity, around 70%, is also beneficial, preventing corks from becoming brittle. Proper storage ensures your wine develops its full potential.