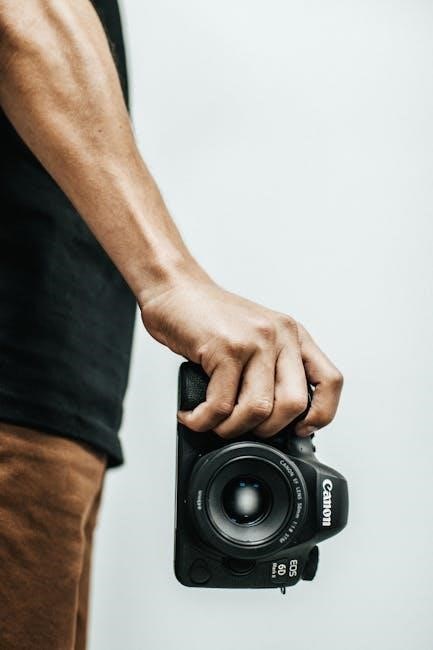
Manual Mode allows photographers to gain full control over aperture, shutter speed, and ISO, enabling precise adjustments to capture images exactly as envisioned, enhancing creativity and technical precision․
What is Manual Mode?
Manual Mode, often denoted as “M” on camera dials, is an advanced shooting mode that grants photographers full control over exposure settings, including aperture, shutter speed, and ISO․ Unlike automatic modes, Manual Mode eliminates the camera’s automated decisions, allowing users to independently adjust each setting to achieve their desired creative vision․ This mode is ideal for professionals and enthusiasts seeking precise control over their images․ By adjusting aperture for depth of field, shutter speed for motion effects, and ISO for light sensitivity, photographers can optimize their shots according to specific lighting conditions and artistic goals․ Manual Mode requires a deeper understanding of photography fundamentals but offers unparalleled creative flexibility, making it a powerful tool for capturing unique and professional-looking photographs․
Importance of Manual Mode in Photography
Manual Mode is essential for photographers seeking precise control over their images, offering the freedom to adjust aperture, shutter speed, and ISO independently․ This mode is crucial for capturing photos that match a photographer’s creative vision, as it allows for intentional decisions about lighting, depth of field, and motion․ By bypassing automatic settings, photographers can overcome limitations imposed by the camera’s algorithms, ensuring optimal exposure in challenging lighting conditions․ Manual Mode is particularly valuable for professional results, enabling photographers to fine-tune every aspect of their shots․ It empowers creativity and technical precision, making it indispensable for those aiming to produce high-quality, visually striking photographs that stand out․ Mastering Manual Mode is a cornerstone of advanced photography, providing the tools to transform ideas into compelling visual stories․
Key Components of Manual Mode
Manual Mode’s core elements—aperture, shutter speed, and ISO—empower photographers to control light, motion, and noise, enabling precise and creative image capture tailored to any scenario․
Aperture: Understanding F-Stops and Their Impact
Aperture is a fundamental component of manual mode, controlling the camera’s lens opening to regulate light entry․ Measured in f-stops (e․g․, f/2․8 or f/16), it influences depth of field and exposure․ Lower f-stops create a larger aperture, allowing more light and a shallower depth of field, ideal for isolating subjects․ Higher f-stops result in a smaller aperture, less light, and a deeper depth of field, keeping more of the image in focus․ Adjusting aperture enables photographers to balance light intake with artistic control over focus․ For portraits, a low f-stop blurs backgrounds, while landscapes often use high f-stops for sharpness throughout․ Aperture works in harmony with shutter speed and ISO to achieve desired exposure, offering precise control over lighting and composition, making it a critical tool for creative photography․
Shutter Speed: Controlling Motion and Exposure
Shutter speed determines the duration the camera’s shutter remains open, influencing motion capture and exposure․ Measured in seconds or fractions, it freezes or blurs motion․ Faster speeds (e․g․, 1/1000th of a second) are ideal for sharp images of moving subjects, while slower speeds (e․g․, 1 second) create artistic blur, such as in waterfalls․ In manual mode, photographers can adjust this setting to achieve desired effects․ A faster shutter speed is beneficial in bright light to prevent overexposure, whereas slower speeds are suited for low-light conditions․ Balancing shutter speed with aperture and ISO is crucial for optimal exposure․ For instance, freezing a bird in flight requires a fast speed, while a slow speed can create a milky effect in water․ This control allows for creative expression and technical precision in photography․
ISO: Sensitivity to Light and Noise Control
ISO determines the camera sensor’s sensitivity to light, impacting image brightness and noise levels․ Lower ISOs (e․g․, 100-400) are ideal for bright conditions, minimizing noise and grain․ Higher ISOs (e․g․, 6400-12800) brighten images in low light but may introduce noise or a grainy effect․ In manual mode, adjusting ISO allows photographers to balance exposure without altering aperture or shutter speed․ For instance, in daylight, a low ISO ensures sharp, noise-free images, while in dim settings, a higher ISO captures sufficient light; However, excessive ISO can degrade image quality, so it’s crucial to use the lowest necessary value for the scene․ Proper ISO management enhances creativity and technical control, enabling photographers to achieve their desired aesthetic while maintaining image integrity․ Balancing ISO with aperture and shutter speed is key to mastering manual mode photography․

Why Use Manual Mode?
Manual mode grants photographers full creative control, allowing precise adjustments to aperture, shutter speed, and ISO․ It unlocks artistic expression and overcomes automatic mode limitations for tailored results․
Overcoming Limitations of Automatic Modes
Automatic modes, while convenient, often fail to optimize settings for unique lighting conditions or creative visions․ Manual mode eliminates these limitations by granting full control over aperture, shutter speed, and ISO, allowing photographers to achieve precise exposure and artistic effects․ In auto modes, the camera may prioritize incorrect exposures or fail to capture the desired mood․ Manual mode enables photographers to override these defaults, ensuring images align with their creative intent․ For instance, it allows for intentional under or overexposure, motion blur, or sharp focus, providing the flexibility to adapt to challenging lighting scenarios․ By bypassing automatic restrictions, manual mode empowers photographers to deliver professional-quality results tailored to their artistic vision․
Creative Control and Flexibility
Manual mode unlocks unparalleled creative control, allowing photographers to craft images that reflect their unique vision․ Unlike automatic modes, which prioritize convenience over precision, manual mode empowers shooters to fine-tune aperture, shutter speed, and ISO independently․ This flexibility enables the capture of subtle details, such as intentional blur or sharp focus, and the manipulation of light to evoke specific moods․ For instance, a slow shutter speed can create artistic motion effects, while a wide aperture can isolate subjects with a shallow depth of field․ Manual mode also excels in challenging lighting conditions, where automatic modes often struggle to balance exposure․ By giving photographers the tools to experiment and adapt, manual mode fosters creativity and ensures that every shot is a deliberate expression of their artistic intent․
Step-by-Step Guide to Using Manual Mode
Switch to Manual Mode (M) on your camera, then adjust aperture, shutter speed, and ISO to achieve desired exposure․ Use the exposure triangle as a guide and refer to a manual mode cheat sheet for quick reference․
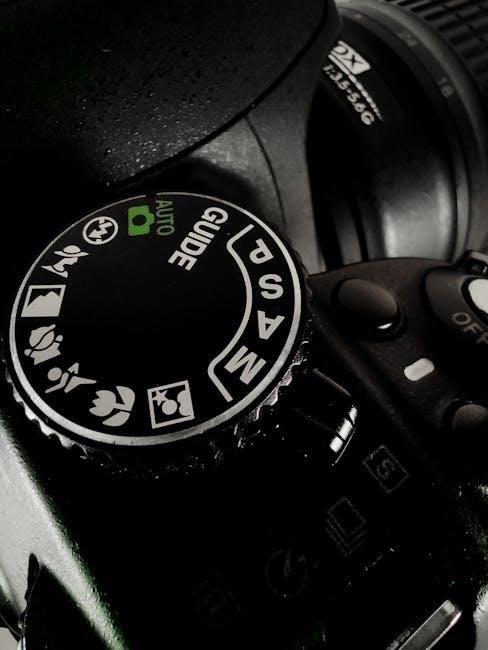
Selecting Manual Mode on Your Camera
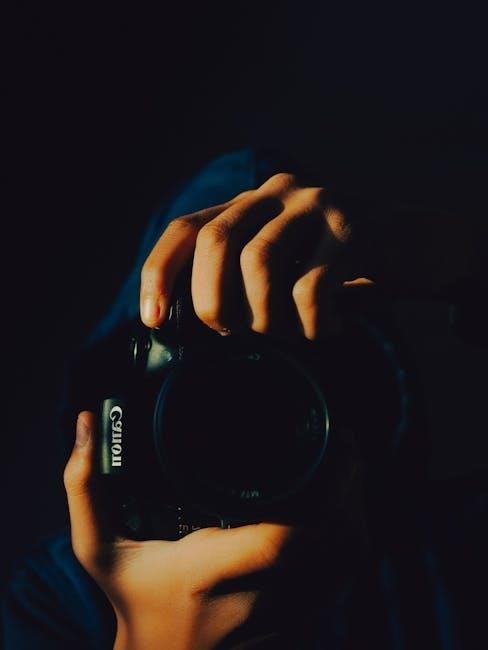
To begin using manual mode, locate the mode dial on your camera, typically found on the top panel․ Rotate the dial until the “M” or “Manual” option is selected․ This setting grants full control over aperture, shutter speed, and ISO, allowing you to customize each parameter to suit your creative vision․ Once in manual mode, you can adjust these settings using dedicated dials or buttons, usually located near the mode dial or on the lens․ Ensure you familiarize yourself with the camera’s layout to make adjustments efficiently․ With manual mode activated, your camera no longer automates exposure, giving you complete freedom to experiment and achieve precise results․ This step is foundational for mastering manual photography, as it unlocks the ability to fine-tune every aspect of your shot․
Understanding the Exposure Triangle
The Exposure Triangle is the foundation of manual mode photography, comprising aperture, shutter speed, and ISO․ Aperture regulates light entry through the lens, with smaller f-stops (like f/2․8) allowing more light and creating a shallower depth of field․ Shutter speed controls exposure duration, with faster speeds freezing motion and slower speeds creating blur․ ISO adjusts the sensor’s light sensitivity, with lower values (like ISO 100) suited for bright conditions and higher values (like ISO 6400) for low light, though risking noise․ Balancing these elements is crucial for achieving proper exposure․ Adjusting one component often requires compensating with the others․ For instance, opening the aperture (lower f-stop) to let in more light may necessitate a faster shutter speed or lower ISO to avoid overexposure․ Mastering the Exposure Triangle enables precise control over image aesthetics and technical quality․
Practical Example: Setting Up Manual Mode
Start by setting your camera to Manual Mode (M) using the mode dial․ For a daytime outdoor shoot, begin with ISO 400, aperture f/5․6, and shutter speed 1/1000th of a second․ Check the light meter in your viewfinder or LCD to ensure proper exposure․ If the meter shows overexposure, increase the shutter speed or aperture․ For underexposure, decrease the aperture or lower the shutter speed․ Adjustments should be incremental to maintain balance․ For example, if the image is too bright, try increasing the shutter speed to 1/2000th or raising the aperture to f/8․ If the image is too dark, lower the shutter speed to 1/500th or open the aperture to f/4․ This hands-on approach helps you understand how each setting interacts and achieves the desired result․ Practice this process to refine your skills in manual mode photography․
Advanced Techniques in Manual Mode
Mastering manual mode involves refining white balance, manual focus, and bracketing to enhance dynamic range, ensuring precise control over lighting, focus, and artistic expression in photography․
Mastering White Balance for Accurate Colors
White balance is a critical aspect of manual mode photography, as it ensures accurate color representation by adjusting the camera’s interpretation of light․ Proper white balance eliminates unwanted color casts, such as overly warm or cool tones, resulting in more natural-looking images․ While many photographers rely on auto white balance, manual mode allows for precise control by selecting from presets like Daylight, Shade, or Tungsten, or by setting a custom value using a gray card or white reference․ This feature is particularly useful in mixed lighting conditions, where automatic settings may struggle to adapt․ Additionally, white balance can be adjusted in post-production, offering flexibility for creative or corrective enhancements․ By mastering white balance, photographers can achieve consistent and visually appealing color accuracy, elevating their images to a professional level․
Using Manual Focus for Precision
Manual focus provides photographers with absolute control over where and how their camera focuses, allowing for precise sharpness in their images․ While autofocus is convenient, manual focus is essential in situations where accuracy is critical, such as macro photography, portraits, or low-light conditions․ By using the focusing ring on the lens, photographers can bypass the camera’s autofocus system and ensure the subject is exactly where they want it․ This method is particularly useful for avoiding distractions or ensuring sharpness in complex compositions․ Many cameras also offer aids like focus peaking or split-screen focusing to assist with manual adjustments․ Mastering manual focus enables photographers to achieve sharper, more intentional images, especially in challenging lighting or when working with slow or unreliable autofocus systems․ With practice, manual focus becomes second nature, enhancing overall creative control and precision․
Bracketing for Dynamic Range
Bracketing is a powerful technique in manual mode that involves capturing multiple shots of the same scene at different exposure levels․ This method helps photographers achieve a wider dynamic range, ensuring details are preserved in both bright highlights and dark shadows․ By taking several exposures—typically three to seven—photographers can later merge them using HDR (High Dynamic Range) software․ Bracketing is particularly useful in high-contrast scenes, such as landscapes with vibrant skies and dark foregrounds․ Most cameras allow for automatic bracketing, but manual mode offers precise control over exposure increments․ This technique requires a tripod to maintain alignment across frames․ The result is a single image with enhanced tonal depth, capturing the full range of light and dark areas as seen by the human eye․ Mastering bracketing enhances the ability to convey the true essence of a scene in a single frame․
Common Challenges in Manual Mode
Mastering manual mode presents challenges like managing exposure, avoiding over/underexposure, and controlling noise in low light, requiring practice and precise adjustments to achieve desired results․
Troubleshooting Overexposure and Underexposure
Overexposure and underexposure are common issues in manual mode․ To fix overexposure, reduce the aperture (higher f-stop), increase shutter speed, or lower ISO․ For underexposure, open the aperture (lower f-stop), slow shutter speed, or raise ISO․ Bracketing helps capture a range of exposures, while a tripod ensures stability․ Practice adjusting settings and review images on the LCD to make immediate corrections․ Balancing these elements is key to achieving optimal exposure and capturing the desired image quality․
Managing Noise and Grain in Low Light
When shooting in manual mode under low-light conditions, managing noise and grain is crucial for maintaining image quality․ To minimize noise, use the lowest ISO necessary for proper exposure, as higher ISOs can introduce digital noise․ Utilize a tripod to stabilize the camera, allowing slower shutter speeds without blur․ Wider apertures (lower f-stops) can also let more light in, reducing the need for high ISOs․ If noise persists, consider using noise reduction tools in post-processing software․ Bracketing exposures can help capture a range of images for merging later․ Experiment with these techniques to find the right balance between noise control and desired artistic effects, ensuring your low-light photos remain sharp and professional․
Practical Tips for Mastering Manual Mode
Consistent practice, using a tripod for stability, and experimenting with various lighting conditions are key to refining your manual mode skills and achieving professional results efficiently․
Practice and Consistency
Mastering manual mode requires regular practice and consistency to develop muscle memory and confidence․ Start by practicing with familiar subjects, gradually experimenting with different lighting conditions and compositions․ Consistent practice helps you understand how aperture, shutter speed, and ISO interact to achieve desired effects․ Begin with static objects to focus on exposure settings, then progress to dynamic scenes to refine your skills․ Reviewing your photos and analyzing what worked well or what didn’t is crucial for improvement․ Over time, consistent practice will make manual mode intuitive, allowing you to focus on creativity rather than technical adjustments․ Dedication and repetition are key to unlocking the full potential of manual mode and elevating your photography skills․
Using a Tripod for Stability
A tripod is an essential tool for photographers using manual mode, especially in low-light conditions or when working with slow shutter speeds․ It provides stability, preventing camera shake and ensuring sharp images․ By keeping the camera steady, a tripod allows for precise control over exposure settings without compromising image quality․ This is particularly useful when experimenting with manual focus or long exposures․ Additionally, a tripod enables you to compose shots more carefully, giving you time to adjust framing and focus before capturing the photo․ For optimal results, use a sturdy tripod with adjustable height and a reliable head, such as a ballhead or pan-tilt, to maintain stability and achieve professional-looking results consistently․
Experimenting with Different Lighting Conditions
Lighting is one of the most critical factors in photography, and manual mode allows you to harness its full potential․ Natural light, artificial light, and mixed lighting conditions each present unique challenges and opportunities․ Understanding how to adjust aperture, shutter speed, and ISO in various lighting scenarios is key to mastering manual mode․ For instance, harsh midday sun may require faster shutter speeds and smaller apertures to prevent overexposure, while low-light situations may demand slower shutter speeds or higher ISOs․ Experimenting with backlight can create dramatic silhouettes, and golden hour can add warmth to your images․ By practicing in different lighting conditions, you can refine your skills in balancing exposure and achieving the desired mood in your photographs․ This hands-on approach will help you develop a keen eye for light and its transformative power in photography․
Mastering Manual Mode unlocks your camera’s full creative potential, allowing precise control over every shot․ Consistent practice and patience will elevate your photography to new heights․
The Importance of Practice and Patience
Mastering Manual Mode requires consistent practice and patience․ As you experiment with aperture, shutter speed, and ISO, you’ll gradually develop muscle memory and intuitive control․ Start with familiar subjects and lighting conditions to build confidence․ Over time, you’ll learn to anticipate how adjustments impact your images․ Patience is key, as it may take several attempts to achieve the desired results․ Don’t be discouraged by initial mistakes—they are part of the learning process․ With persistence, you’ll unlock the full creative potential of Manual Mode, enabling you to capture unique perspectives and artistic visions․ Remember, practice is the foundation for mastering Manual Mode and elevating your photography skills to new heights․
Final Tips for Improving Your Photography Skills
To refine your photography skills in Manual Mode, organize your photos for consistent review and learning․ Study the work of professional photographers to gain inspiration and insights․ Experiment with diverse lighting conditions and subjects to broaden your experience․ Stay updated with the latest camera techniques and accessories to enhance your workflow․ Most importantly, reflect on feedback from peers or mentors to identify areas for improvement․ By combining dedication with a willingness to learn, you’ll continually refine your craft and produce exceptional images that reflect your artistic vision․ Embrace the journey of growth, and remember, every shot is an opportunity to improve and create something extraordinary․