Drywall installation is a fundamental process in modern construction, offering efficient, durable walls and ceilings․ It provides smooth surfaces for painting and finishing, enhancing both aesthetics and functionality in residential and commercial spaces․
1․1 Importance of Drywall in Construction
Drywall has become a cornerstone in modern construction due to its versatility, efficiency, and cost-effectiveness․ It provides a smooth, durable surface for walls and ceilings, making it ideal for both residential and commercial projects․ Drywall is fire-resistant, which enhances safety in buildings․ Additionally, it offers excellent soundproofing qualities, reducing noise between rooms․ Its lightweight yet sturdy structure simplifies installation and reduces construction time compared to traditional plastering methods․ Drywall also allows for easy integration of electrical and plumbing systems, making it a practical choice for modern designs․ Furthermore, it supports energy efficiency by providing thermal insulation, helping to regulate indoor temperatures․ With its ability to be finished with paint or textures, drywall enhances aesthetic appeal while meeting functional requirements․ Its mold- and moisture-resistant varieties further add to its durability in diverse environments․ Overall, drywall is indispensable in achieving safe, efficient, and visually appealing spaces․ Its widespread adoption underscores its critical role in contemporary building practices․
1․2 Brief History and Evolution of Drywall
The use of drywall, also known as plasterboard, dates back to ancient civilizations, where materials like gypsum and lime were used for wall construction․ However, the modern version of drywall emerged in the late 19th century․ In 1894, Augustine Sackett patented a machine to produce sheets of gypsum plaster sandwiched between layers of paper, marking the beginning of drywall as we know it today․ Initially, it was met with skepticism but gained popularity post-WWII due to its affordability and ease of installation compared to traditional plaster․ The 1950s saw the standardization of drywall sheets, making it a staple in construction․ Over the years, drywall has evolved to meet various needs, such as moisture-resistant and fire-rated varieties․ These advancements have solidified its role as a versatile and essential material in modern building practices, offering durability, efficiency, and adaptability for diverse architectural demands․ Its evolution reflects the continuous innovation in construction materials to address functional and environmental challenges․
Preparation for Drywall Installation
Preparation is crucial for a successful drywall installation․ Gather essential tools like measuring tapes, levels, and utility knives․ Assess the space, ensuring walls and ceilings are clear and structurally sound․ Measure rooms to calculate materials needed, and always wear safety gear, including gloves and goggles, to prevent injuries during the process․ Proper planning and organization ensure a smooth installation workflow․

2․1 Essential Tools and Materials Needed
Installing drywall requires specific tools and materials to ensure a professional finish․ Essential tools include a utility knife for cutting drywall, a measuring tape for accurate measurements, and a level to ensure surfaces are even․ A drill with screwdriver and Phillips bits is necessary for securing drywall sheets, while a trowel or joint knife is used for applying joint compound․ Sandpaper or a sanding sponge is needed for smoothing surfaces, and a ladder or lift is essential for reaching ceilings․ Additionally, a pencil and marker are handy for marking cuts and placements․
Key materials include drywall sheets (standard or moisture-resistant), joint compound (also known as spackling compound), and drywall tape for reinforcing seams․ Drywall screws are used to attach sheets to studs, while drywall anchors provide extra support in hollow walls․ Safety gear like gloves, safety goggles, and a dust mask are crucial to protect against injuries and dust inhalation․ Proper organization of these tools and materials ensures efficiency throughout the installation process․
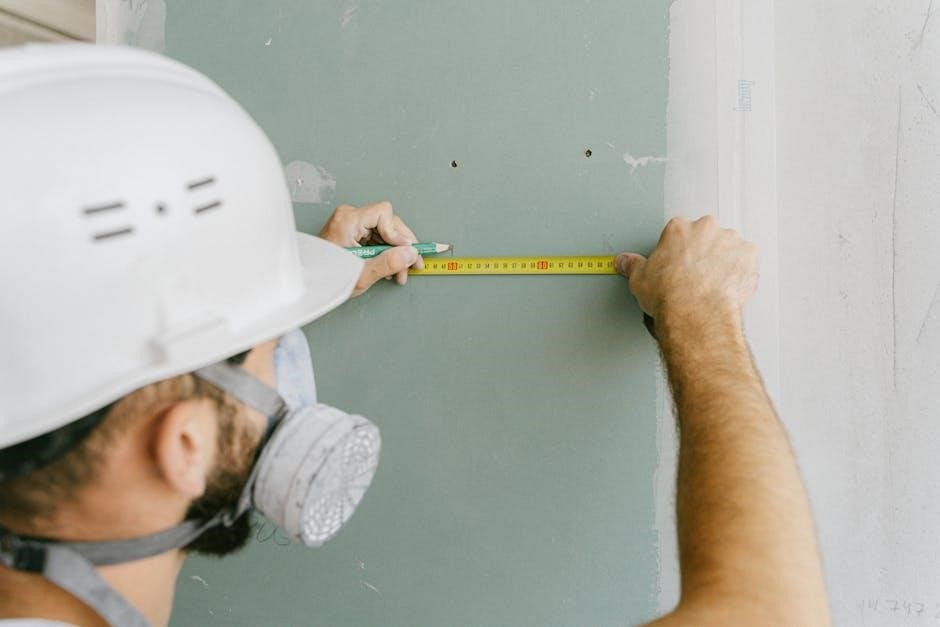
2․2 Measuring and Calculating Drywall Requirements
Accurately measuring and calculating drywall requirements is crucial to avoid material waste and ensure a smooth installation process․ Begin by measuring the length and height of each wall and ceiling in the project area․ Multiply these dimensions to determine the square footage of each section․ Summing these values provides the total square footage of drywall needed․ A general rule of thumb is to estimate one 4′ x 8′ drywall sheet (32 square feet) for every 32-48 square feet of wall surface, depending on the project’s complexity and the number of cuts required․
Additionally, consider the thickness of the drywall sheets (typically 1/2″ or 5/8″) and whether moisture-resistant or fire-rated drywall is needed for specific areas․ It’s also wise to add 10-15% to the total to account for waste and irregular cuts․ Proper measurement and calculation ensure that materials are ordered efficiently, saving both time and money during installation․

2․3 Safety Precautions and Protective Gear
Safety is paramount during drywall installation to prevent injuries and ensure a secure working environment․ Always wear appropriate protective gear, including safety glasses or goggles to protect eyes from dust and debris․ A dust mask is essential when cutting drywall to avoid inhaling gypsum particles․ Gloves provide grip and protect hands from cuts and abrasions when handling drywall sheets․
A sturdy pair of boots with slip-resistant soles is recommended to prevent falls, especially when working on ladders or scaffolding․ Additionally, ensure the work area is well-ventilated to minimize dust circulation․ Avoid wearing loose clothing that could get caught in tools or materials․ When lifting drywall sheets, use proper lifting techniques to prevent muscle strain or injury․
Lastly, keep power tools and sharp objects out of reach of children and unauthorized individuals․ Regularly inspect tools and equipment for damage to maintain safety standards throughout the project․ Prioritizing safety ensures a smooth and incident-free installation process․
Drywall Installation Process
Drywall installation involves cutting sheets to size, securing them to walls and ceilings, and finishing seams for a smooth surface․ Proper tools and techniques ensure professional results and durability in construction projects․
3․1 Cutting Drywall Sheets to Size

Cutting drywall sheets accurately is essential for a seamless installation․ Use a utility knife or drywall saw to score and break the sheets along measured lines․ Always measure twice to ensure precise cuts, minimizing waste and ensuring proper fit․ When cutting, place the drywall on a flat surface and apply steady pressure to avoid uneven edges․ For curved cuts, use a jigsaw or a keyhole saw․ Safety is crucial; wear gloves and protective eyewear to prevent injuries from sharp edges or debris․ Properly sized drywall sheets fit neatly into walls and ceilings, reducing the need for excessive taping and mudding during the finishing phase․ Accurate cutting saves time and materials, ensuring a professional-quality installation․ Plan cuts strategically to accommodate electrical outlets and switches, maintaining structural integrity and aesthetics․ This step sets the foundation for a smooth, durable wall surface․
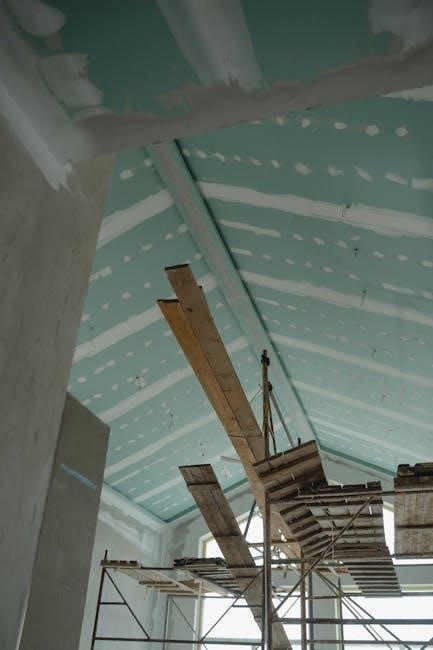
3․2 Hanging Drywall on Walls and Ceilings
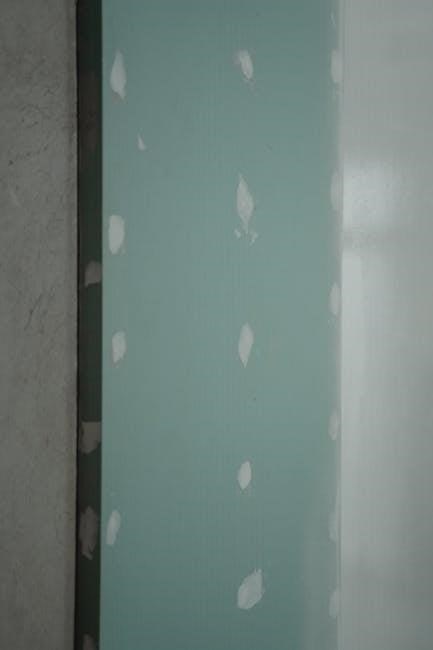
Hanging drywall on walls and ceilings is a critical step in the installation process, requiring attention to detail and proper technique․ Begin by ensuring the framing is secure and free of debris․ Start with the ceiling, as it is typically more challenging, using a drywall lift or enlisting help to maneuver heavy panels․ Align the drywall sheets with studs, leaving a 1/4-inch gap between panels for expansion․ Secure them with drywall screws, spaced 6-8 inches apart on walls and 12 inches on ceilings․ Avoid overtightening to prevent cracking․ For walls, work from the bottom up, ensuring panels fit snugly around electrical outlets and switches․ Use a utility knife or saw to cut panels to size, labeling each piece for its intended location․ Always wear protective gear, including gloves and a dust mask, to handle sharp edges and dust safely․ Properly hung drywall ensures a smooth surface for finishing and minimizes future repairs․
3․3 Finishing Drywall: Taping, Mudding, and Sanding
Finishing drywall involves taping, mudding, and sanding to achieve a seamless surface․ Start by applying drywall tape over all seams and corners, pressing firmly to ensure adhesion․ Next, spread a thin layer of joint compound (mud) over the tape using a drywall knife, feathering the edges for a smooth blend․ Allow the mud to dry completely, then sand the area with a fine-grit sandpaper to remove excess and create a smooth finish․ Apply additional coats of mud and sand as needed until the surface is even․ For corners, use a corner knife or apply tape and mud carefully to avoid bulges․ After the final sanding, wipe away dust with a damp cloth to prepare the surface for painting or finishing․ Proper taping and mudding ensure strong joints, while thorough sanding guarantees a professional appearance․ This step is crucial for achieving a polished look in any drywall project․